Getting Started | Custom Button FAQ | Custom Button Prices | Button Testimonials
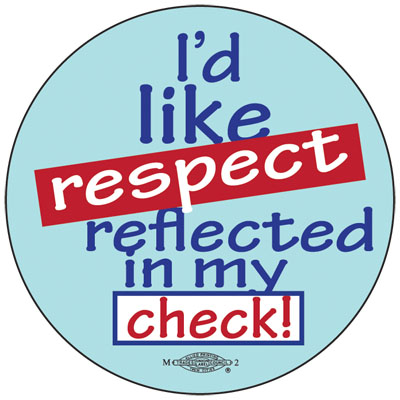
The possibilities for your custom buttons are endless. Start the process by talking with us about your idea and your budget. Email Jeff at buttons@rlmartstudio.com. See below for all the details!
If you want to design your own button, PLEASE READ THE REMAINDER OF THIS PAGE BEFORE YOU SEND IN ANYTHING, because it’s a little trickier than you may think. If you don’t understand any of the following guidelines, please email or before you spend too much time on it. We’ll let you know if what you have in mind will be something we can work with.
>>What format should I use to submit?
The best format to use is Adobe Illustrator. These are files with the extension “.ai”. Since we don’t have every font there is, you would be wise to convert all fonts to paths/outlines (or, you could send us the font files to download, if you have them).
The next best formats are:
- Photoshop files. These are files with the extension “.psd” [Rasterize any fonts if using a custom font]
- Encapsulated PostScript files. These are files with the extension “.eps”
- Portable Document Format, or PDF files. These are files with the extension “.pdf”
We can also use other image files like “.jpg” and “.png”. In any case, any image file should be saved at a resolution of 300dpi, if possible, for best print quality.
Remember that what we see on computer screens never looks exactly like the physical object that will be your button. After all, color made by mixing light on a monitor screen is different than color made by mixing ink on paper. Usually we will get very close. We work in the CMYK format, not with Pantone colors. With custom designs we will always send you a PDF proof copy before production begins. No buttons will be made until you approve the design that you receive as a proof. If you wish to have a physical (hard-copy) proof, for example to match an exact color for your brand guidelines, we can send one via USPS via your request, or you can stop in at our Minneapolis shop. Just ask.
ARTWORK SIZING
When submitting button artwork electronically, be advised that the background color must extend beyond the visible area all the way to the diameter of the “cut” that is made when preparing the buttons for production. This is because the artwork will wrap around the edges of the buttons, and some areas beyond the clearly-visible areas will show around the edges.
Here are the dimensions of the visible surface, and the dimensions to which the background colors should extend, for each size of button that RLM Arts will be making for you or your allies, friends, or customers. PDF templates are included for download. If you would like a template in Adobe Illustrator format, please email buttons@rlmartstudio.com.
FOR A 1.25″ BUTTON:
- The diameter of the clearly visible area should be no more than 1.125″
- The cutline must extend to exactly 1.6261″
- For a printable template of these dimensions in PDF format, click HERE
FOR A 1.75″ BUTTON:
- The diameter of the clearly visible area should be no more than 1.5625″
- The cutline must extend to exactly 2.0907″
- For a printable template of these dimensions in PDF format, click HERE
FOR A 2.25″ BUTTON:
- The diameter of the clearly visible area should be no more than 2.125″
- The cutline must extend to exactly 2.6361″
- For a printable template of these dimensions in PDF format, click HERE
FOR A 3″ BUTTON:
- The diameter of the clearly visible area should be no more than 2.875″
- The cutline must extend to exactly 3.4792″
- For a printable template of these dimensions in PDF format, click HERE
In all cases-especially if the background color is white-you should include the “cut line,” which is a black circle at the outermost edge of the background. For example, the cut line for a 3″ button should be a circle with a 3.4792″ diameter. This helps us make certain your artwork is centered on your button.
GENERAL DESIGN NOTES :
All new jobs incur a one-time setup/design charge. The basic charge, if you provide the artwork ready to go, is $20. This covers the time it takes for us to prepare the print-ready file, test, print and gang-punch your button art to get the job ready for production. This fee is waved on re-orders.
ADDITIONAL DESIGN TIME CHARGES: If you do all the design work following the guidelines here, no additional charge needed!
If we design your button, we’ll add a variable design charge. A simple slogan or image that we can put together in a few minutes might be a mere $10 (for a total of $30). If your job is very complicated, perhaps with multiple designs and a long revision process, it could be an extra $50 or more. When you get in touch, we will ask for your agreement on a rate and what is included in the scope of work, before proceeding.
RUSH JOBS: New jobs take their place behind existing jobs. As we are agreeing on a job we’ll tell you when we can start on it. Rush charges to jump the line depend on our current workload and capacity; ask us.
>>Should you do your own printing?
Generally we will do the printing of the artwork in-house. If you need or wish to do your own printing, rather than letting us do the printing, PLEASE READ THE FOLLOWING:
You don’t save any money by bringing us pre-printed button images. You may have reasons to do your own printing, such as specialized color-matching needs we can’t handle, or special paper such as glitter or holographic.
IF the images on all the different pages you have printed line up perfectly from one page to the next, there will be no extra charge. However, if you provide the printed pages containing button images and the images are not lined up exactly from one page to the next, the pages cannot be stapled together and gang-punched. This is a big headache. Add 15% to the price of the order, and be prepared for a final product where the buttons are not all exactly centered.
Getting Started | Custom Button FAQ | Custom Button Prices | Button Testimonials